Monday, March 31, 2014

My Weekend Project


This was a quick and fun project using my Silhouette Portrait.
 

I cut a stencil from freezer paper using a technique from Silhouette School.  After cutting I ironed the freezer paper stencil to the burlap banner. Using craft paint, I applied red paint. I pulled off the freezer paper stencil and had a very crisp “J.” (I love my Silhouette Portrait!)


Friday, March 28, 2014

What, exactly, is Operation Write Home?


I’m glad you asked?  

Started in 2007 by Sandy Allnock, Operation Write Home provides quality handmade greeting cards to our nation’s deployed heroes so they can send cards to their love ones at home. As Sandy says on the web site,” there are no card shops in Afghanistan outposts.” Thousands of crafters throughout the U.S and abroad use their time and skills to craft cards which they mail to OWH.

Once the volunteers at OWH headquarters receive the cards, they triage for suitability, mail ability and quality. They send cards that may have suffered detachment to their card hospital for repairs.  After they are triaged, they are packed and mailed to overseas military bases and posts. The cards are placed in common areas for the troops to choose and send home to love ones.


Photo from OWH Facebook page.


While the cards are very much appreciated by our troops, they also acknowledge another layer of heroes, the families holding down the home front, waiting for their dad, husband, son, daughter, brother, or sister to return. Thinking how awesome it must feel for a mom to receive an unexpected Mother’s Day card from her son/daughter in a war zone, I totally enjoyed making these to contribute.


Want to join the efforts of other appreciative crafters? Visit the OWH web site for details. It is very important you read the details carefully. Did you know loose glitter on a uniform could draw attention from the enemy? Would you want to receive a card from your boyfriend or husband with another woman’s handwritten sentiment? These are very important details!
There is a bonus on the OWH website; over 100 card making tutorials and videos!
I am very excited to team up with Kristin Williams at Ephemera Paducah to host a OWH Card Making Event on Saturday, April 19. Detailed information will be on the Ephemera Paducah Workshop and Events calendar.  You can also message me on Facebook or email me at chrysteljanne@gmail.com.
I just learned, Kristen Powers from RubberMoon Stamps want to donate stamps!
Now, I must get to the studio and make cards!


Thursday, March 20, 2014

This Week in The Underground


A great deal of time was spent in The Underground this week; very little time was spent creating.

As you may have noticed, I have tweaked the blog a bit, getting ready for the RubberMoon Creative Design Team adventure. You can now see what I look like; thank you Mark McCoy!  Mark, a professional photographer, lives next door; how lucky is that! In fact I am lucky to live in a neat little art community where folks just help one another. We have a little group called Social Media Salon; we get together each month and over a bottle of wine, we discuss the ins and outs of the ever changing social media. This past week my blogs were critiqued and thus I am tweaking. Thanks Rachel Biel and Rose Hughes for sharing your professional experiences.
Handy Randy finished the paper craft base cabinet; so of course, I had to organize the new space.


This week was spring break at Paducah School of Art andDesign. When we return to class on Monday we will start charcoal drawing and I am very excited! I did a little charcoal work in one of Juanita Gillium’s classes at The Art Room a few years back. I loved it! This is from the class.


I did take a bit of time and played with my new stamps from RubberMoon. Can’t show you what I am doing but it will be on their blog in a couple of weeks. Meanwhile, hop on over to their blog and see what other artists are doing with the cool RubberMoon stamps.
Also, this week, I have been planning an event with Kristin Williams at Ephemera Paducah with which I am very excited.  Don’t want to share it just yet as we are in the planning stage. But I will tell you, it is a project in which participants can give back to those who have given so much. Keep in touch, details coming soon!


Tuesday, March 18, 2014

What have I gotten myself into??????

I was invited to apply to the RubberMoon Creative Design Team, and my application accepted!!!! They will provide me with some of their really cute, adorable stamps to use in my projects, which I will share on the RubberMoon Blog as well as here in The Underground.

While I am extremely excited to be included on the design team, I must admit, I am a wee bit intimidated. You see, the other team members are very accomplished artists. Now we all know, I am a crafter and just recently stuck my head out from the underground. As this blog description states, I am more about the process than the project. Oh my!!!! I am on a design team?

 Okay, (deep breath…...) worst case scenario, I will embarrass myself greatly. On the other hand, I can’t help but gain inspiration from the talented artists on the RubberMoon Creative Design Team. It is truly worth your time to check out their websites and blogs in the left side bar.

 My new stamps came yesterday, I am heading to the studio to play!!!


http://rubbermoon.com/blogs/news

Saturday, March 8, 2014

This Week in The Underground


This Week in the Underground

Most of the time in The Underground this week was spent painting me, the floor and the base cabinet. (HR says he always buys extra paint when I am doing the painting.) Messy as it/I was, the base cabinet for the paper craft area is completed and waiting for the counter top to be installed.


That would have happened today, but it would have been very treacherous for HR and me to carry the counter top down this slippery slope.


We live in a 1930 something cottage style house where originally the garage was in the basement; it is now my craft studio. There is a concrete slope, formerly the drive, to the entrance to the studio. It is in the shade so even with the warm temperatures of the past couple of days, it still remains snow and ice covered.  

The studio update will remain on hold next week as we head to Florida; no not for a relaxing beach vacation but to lend a hand to our daughter-in-law and granddaughters. They moved into a new house this week and HR’s skills and tools are needed for the fine tuning. I get to cook, do laundry, drive the girls and anything else they might need as they get settled. Actually, some of my studio time this week was spent in my kitchen preparing food to take. Love cooking for our girls and, of course, that too is a craft.

When we return, I hope to see some daffodils and hellebores blooming!
You can keep up with my garden as it wakens from this long, cold winter over on my other blog, Chrystel's Potager.


Wednesday, March 5, 2014

FOCUS ....on a Sign


Following a trend to select One Word for the year instead of making a list of New Year Resolutions, I chose focus. In addition to other areas of my life, I want to focus on one art/craft project at a time. With that in mind, I made a sign for my studio. (We will see how this works with my AADD!)

I used a technique I learned a couple of years ago in a Subway Art workshop at Kijsa Houseman’s studio. In the workshop we used precut, adhesive stencils; very nice but a bit expensive. Last year, I chose strength as my word. Wanting a visual reminder and not wanting to spend a great deal of money,  I printed the letters on a large mailing label, cut them out with scissors, adhered them to a painted board , painted over the letters and board with a contrasting color; when dry I peeled away the label. This worked but the paint soaked through the paper and I had to do a bit of touch up painting.


I tried it again using a phase I associate with my son; this time I put contact paper on top of the printed letters on the mailing label (to prevent the paint from soaking through), cut the letters out with scissors, stuck the letters on the painted board, painted over with contrasting paint and let dry. When I peeled the letters, the contact paper separated from the mailing label and it was quite messy. Again I had to do an amount of touch-up painting and outlined with a black Sharpie to cover the rugged edges.


In searching for tutorials for using my Silhouette Portrait, I found it would cut Contact paper. Okay! Inexpensive, no scissors needed, one eight steps; a no brainer to giving it a try! So, here is how I did it.
Step one, painted a board with left over latex paint. Let it dry over night


Step two, in the Silhouette program, using Comic Sans MS font, I typed the word focus. I re-sized the letters to about 3-inches in height.
Step three, I cut a piece of Contact paper (already had on hand) to fit the Silhouette mat, placed it on the mat (leaving the backing on the Contact paper) and burnished with an old credit card.


Step four, placed the Silhouette mat with the Contact paper in the Silhouette (keep the Contact side up,) chose the vinyl setting speed 8, thickness 4, blade 2 and cut.


(This is where I lost focus and forgot to continue photographing.)

Step five, peeled the Contact letters (which cut very nicely) from the mat and backing, and placed it on the previously painted board, burnished with a credit card.

Step six, painted across the letters with the same latex paint I used to paint the board in order to seal and prevent seepage (a very important step.)Let dry.

Step seven; painted the board and the letters with a contrasting color (I used Annie Sloan Chalk paint as I had it on hand in a color I wanted.) Let dry.

Step eight, peeled the Contact letters from the board. Nice, crisp, no touch-up needed.

Optional, apply a wax like MINIWAX Paste Finishing Wax.


Such fun and so easy! I want to make a sign for the door of the studio and one for the new screened porch! I bet the granddaughters would like one for their bedroom doors! I must raid HR’s scrap lumber box! And I think I need some new fonts! Just saw SilhouetteSchool has a new tutorial on downloading and installing fonts. How convenient!
Will the sign help me stay focused, probably not; but I think having these signs throughout my studio is pretty cool!
Want to make a sign, but don’t own a Silhouette, you can buy alphabet stencils at a craft store (lot less expensive than a die cut machine), attach to a painted board with removable adhesive and pounce on paint; use purchased stencils, draw letters and hand paint; free hand paint letters onto a painted board; or come by the studio and we will make one together!

By the way, another area on which I want to focus this year is healthy eating. I found this delicious chocolate shake on Beautiful Mess blog; so easy and healthy!

Saturday, March 1, 2014

Whee, a Busy Time in The Underground


Wheee, it is a busy time in The Underground! Mostly drawing! My instructor at the PaducahSchool of Art and Design really expects us to draw! Every day! For hours (okay, maybe just one, but I get involved and never stop in one hour). Even so, I stay behind.

This is one of the assignments from a week ago; the instructions were to draw something that would fit in the palm of the hand.


I couldn’t decide on what to draw, so I just went through the house and picked up the first item that would meet the requirement. (I must start putting more thought into my selections.)

 
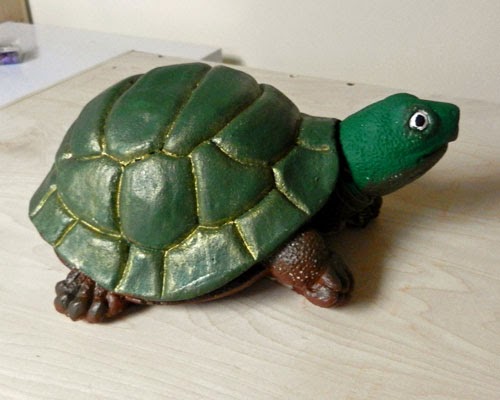
Herbal Turtle’s make-over is completed. Now if the weather would cooperate, I would return him to his home in the herb garden.


I saw some push pins made from buttons on Pinterest and thought they would look cute on the studio bulletin board. Really easy to do, just use a strong glue like E-6000 and glue buttons to regular thumb tacks. 


One of my friends moved into a new home this week, so I made a prayer flag and card to send expressing my wishes for a peace, comfort and happiness.


This year I chose focus for my word of the year.  I made this sign to place in the studio to help me stay focused on the project at hand. (You know, the AADD thing.) I will write a post soon to show how I made the sign.


Now I must get to the studio and start painting the base cabinets for the upgrade.


You may ask, if this is a gift than why am I doing the painting? Well, it’s a pretty simple answer, if I help than it will get done quicker. As I paint this afternoon, Handy Randy will work on the design for the stamp storage. (He has a pretty cool idea going, can’t wait to see how it turns out!)