Showing posts with label Mixed Media. Show all posts

Wednesday, January 2, 2019

Prayer Flags


Being away from The Underground 6 months of the year, I haven’t had much to share in the way of crafts. A friend’s art club is thinking about making prayer flags as a group project. Having made a number of prayer flags, I offered to share a bit of insight here on the blog.

I am not an artist, but have been a crafter as long as I can remember. I ran across an article about the Prayer Flag Project in a Cloth, Paper Scissors’ magazine in 2012. I was hooked. There is no right or wrong way to make them and, since they are made to hang outside in the elements, there is no need for perfection. It is an excellent way to use scraps and to try new techniques.

Below are directions copied from ThePrayer Flag Project website.

Here's Vivika DeNegre's tutorial on how to make a prayer flag. Feel free to be creative and change them to fit your own style. The dimensions used here are 5”x 8” dimension with a 3” hanging area (12.5 x 20.5 cm with a 7.5 cm hanging area) as described below.  Do sign and date your flag. Let me know via email that you are “praying along” and include a photograph of your work or link to a blog so I can post about your flags as well.
Also you can post your flags on our flickr group.


1. Create a place to thread a string by folding one short end over to the back by 3” and press, making a rectangle approximately 5”x8”.  
2. Choose a theme for your prayer, and embellish your flag with paper, painting, stitch, embroidery, buttons, etc.  You are only limited by your imagination and your stash.  Examples of flags can be seen on our flickr group.
3. Add words or journaling to your flag using free motion stitching, hand stitching or simply by writing in a permanent marker.
4. Sign and date your flag.
5. Join the Prayer Flag project (how to participate)
6. Hang it outside!

You will notice, nothing is said about hemming the edges. If you take a look at mine, you will notice most edges are hemmed.


Positive Prayer Flags


I participated in an artist Positive Prayer Flag exchange in 2017, none of the flags I received had hemmed edges, so I no longer hem mine. I wish I could share the beautiful, artistic flags I received, but I am not sure about copy rights and would not want to infringe.


When I am asked to do a workshop, I will take a width of fabric, cut it to an 11-inch length, fold down 3-inches, sew it and then cut into 5-inch widths, making several 5”X 8”-inch flags. Remember these will eventually disintegrate in the elements, so there is no need to back-tack.

As for fabric, I use whatever I have on hand. I really like using Everbilt drop cloth from Home Depot.It takes stenciling really well and the thread pulls easily for a fringe.

And it is inexpensive! (I use drop cloth in a lot of my crafts. It is a good idea to wash the cloth first.)

Pinterest and Instagram  are excellent places to find inspiration.

Click here to see some of my flags.

I hope the art club has a fun evening making Prayer Flags.

As for me, I will be living in a 200 square foot RV for the next few months. I have colored pencils, my Featherweight (aka Miss Wilma) and a bit of fabric with me. Maybe I will create something to blog about.

Tuesday, April 17, 2018

Nature Theme Prayer Flags


What does one do when a Prayer Flag Swap is cancelled? Finish the flags and hang them in the breeze, of course! One of the reasons I like doing prayer flags is to experiment with various techniques and products without concern of perfection. Since I will not be swapping with other artist, the pressure is off and I can just have fun. (But I will miss receiving truly beautiful art from others in the swap.)


Having bought a new printer for the RV and knowing I would be creating while traveling, I chose to experiment with printing on fabric for this project. This sweet little Epson WF-100 is not much larger than a book.


(I prefer Epson printers for fabric printing as they use the Dura Brite ink that doesn’t smear and is pretty much water proof.)


Usually I adhere fabric to either heavy duty freezer paper or to the sticky side of a full size mailing label (my preferred method) before sending it through the printer. Since we were traveling in a small RV I needed to limit my supplies so I took along June Taylor Fabric Sheets for ink jet printers.

Using photos from our winter trip, I cropped and sized them in Photoshop Elements and printed them on the fabric sheets. It was a long drive across the country, so I embellished with embroidery as I rode along (no, I don’t drive The Wanderer.) When I arrived home, I stitched a casing and added eyelash trim. 


The printer performed perfectly, no jamming or ink smears.

Fabric pens travel nicely (aren’t messy like fabric paint ;) I used Tulip Fabric Pens  to paint on drop cloth (which is becoming a favorite canvas.) Adding buttons, beads and a couple little butterflies, it is quite a cheerful little flag.

Now that I am back in The Underground, I have choices. My plan is to finish those projects I have started before I began something new. With a head full of ideas and a wide selection of supplies, I bet that doesn’t happen.  And now I hear my garden calling…..and I must go.

Friday, February 12, 2016

Keeping my commitment to do some art each week while traveling, here is my effort for the past week.

Finished "Miss Prim." She was created with Prismacolor Premiere pencils, the background was done with Derwent Intense Watercolor Pencils. 
Got a little wild here, with eyes this large, perhaps I should add glasses.

I played around a little with Photoshop Elements, attempting to create a little mixed media. Need to work on this a bit.

Sitting outside with my colored pencils, letting my muse just happen is exactly what I had hoped for as we started our retirement journey.

Monday, November 2, 2015

Free Inspiration!

As promised, here are a few freebies I have found on the various blogs I follow. And who doesn't like free! 


On her blog, A Colorful Journey, Carolyn Dube is offering a 5 lesson mixed media workshop with each new video lesson coming out every 3 days. It is free and downloadable, so it can be watched at one’s convenience. She uses variety of supplies and encourages folks to use what is on hand. I have watched one of the videos and can't wait to get back to The Underground and give it a try.


Pintangle has link to a free downloadable for Elsie Svennas A HANDBOOK  OF LETTERING FOR STITCHERS.  It has some very pretty stitches and combination of stitches with clear instructions. A used hardcopy sells for $146 on Amazon. I downloaded it to my iPad.


Every Thursday, Cloth Paper Scissors offers a free download of one of their older magazines on their Facebook page. The free emagazine is offered only on Thursday.If you subscribe to their newsletter, you will have an opportunity to download mini lessons on various topics each Saturday. I have downloaded several magazines and lessons to my iPad. 

Love to make bags or just want to try without investing a lot of money, check out the Bags to Sew website for free patterns. 

On Facebook, Ornation Creation is offering over 100 really cool templates for Zentangling.  It is a closed page and requires a request to join. Once accepted in the group, just download from files, print and tangle!


Documented Faith’s Facebook page is loaded with lots of photos of Bible Journaling.


These are only a few of the free inspirations for crafters on the web. So, how do I get all the free information without cluttering my in-box? I have a separate email address designated for only blogs and newsletters.  

Have some favorite sites for free inspiration? Please share in the comments!

Tuesday, February 10, 2015

Still crafting?

No, I have not been locked in The Underground.
No, I have not abandoned my arts and crafts passion (Although with AADD that could happen, I guess.) 
No, I have not created a master piece and retreated to a secluded island. 

I have been in and out of The Underground, jumping from one project to another as I try to focus on sorting and packing up one side of the studio. (HR is ready to finish the studio update!!!!) With AADD, it is so easy to be distracted as I discover supplies I forgot I owned and half-finished projects.


I have done a little work on the stairwell;


have started on the risers, not sure where or if this is going;


Assignment: Use conte' to draw two things that do not go together.


turned in my first drawing assignment of the semester (I really do not like assigned drawing) 


have done a couple of pages in the Live Richly art journal


It is about the process, right?
and took two road trips to watch/hear our granddaughter in  band concerts. On these trips I did some Zentangle and practice some lettering techniques from last month’s Mixed Media Club.


I brought home a rock tumbler (a one of those it-sounded- good- at- the- time gifts for the granddaughters. I think the noise didn’t go over well with their mom.) I want to give it a try with polishing polymer clay beads. If you don’t hear from me for another few weeks, it could be I had to leave the neighborhood; or it could be I was distracted again. 

Friday, January 16, 2015

Formula for Happiness

On 10-inch burlap canvas. The text was printed on muslin with my Epson WF-3520 printer which uses Dura Brite permanent ink. With Dura Brite, the ink does not smear when it gets wet. After I printed, I decided I wanted a more vintage feel so I soaked the muslin in tea. Either the tea wasn't strong enough or I didn't let it soak long enough; I think it is still too bright.

Friday, December 19, 2014

Holiday Sugared Cranberries


A favorite treat from my kitchen during the holidays.
I shared these wonderful little gems with my Mixed Media Club friends at Ephemera Paducah last evening. As usual, there were request for the recipe, so here it is:

Ingredients:
2 cups water
2 cups granulated sugar        
2 cups fresh cranberries
3/4 cups superfine sugar                                                                                                                                                     
First step:
Combine granulated sugar and water in a saucepan over low heat, stirring mixture until sugar is dissolved. Bring to a simmer, remove from heat (do not boil as the cranberries may pop when added.)

Stir in cranberries; pour mixture into a bowl. Cover and refrigerate 8 hours or overnight.

Next step:

Drain cranberries in a colander over a bowl, reserving steeping liquid if desired. (I save the liquid and use it for a second batch.)

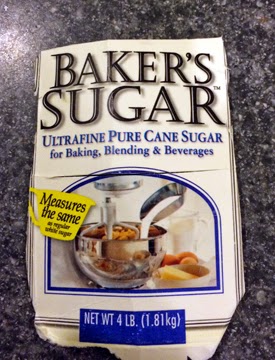
Place superfine sugar in shallow dish (you may have to search for the superfine sugar, I ordered the Baker brand from King Arthur, found the Domino brand tucked away in the sugar section at Krogers.)


Add the drained cranberries, a few at a time, to the bowl and coat with sugar.

Spread sugared cranberries in a single layer on a sheet of wax paper, let stand at room temperature 1 hour or until dry.


My recipe says to store in an airtight container in a cool place for up to one week; can’t comment on the storage as we have never had them last that long.


If you want to print this recipe, note the print view option at the end of this post.

After dining on an array of delicious finger foods and a quick game of dirty Santa, we got busy and worked on our board book journals.


I am always so amazed at the talent of this group! Some are accomplished mixed media artists, some are fine art artists, some are textile artists; they all are so generous in sharing their knowledge and skills with me, a wanna be artist!

The start of my Live Richly journal, 


Thursday, December 18, 2014

Confession time, I have been playing and neglecting the blog. Oh, but I am having fun!


Last week I was invited to join the team from iList Paducah and some other crafty gals for lunch and play at Ephemera Paducah. Kristin provided paper maché letters to spell J-O-Y for us to paint, paper, glue and glitter. Head over to iList and Kelsie will explain the technique and show everyone’s unique style.


On Friday afternoon, local artist Carol Harlan led a workshop on painting tissue and deli paper at Ephemera Paducah


We had great fun coloring diluted gel medium and painting over the sheets.
After they were dry we embellished with more paint and bling.  These will be great to use in art journals.


Guess what we are doing at Mixed Media Club this evening at Ephemera Paducah? Working on board books which work well for art journals! I missed last month’s meeting so I will have a bit of catching up to do.  Kristin says we need a theme; I am going with “Live Richly.” I will use quotes and images to describe what makes life rich for me. Maybe I will share this at a later date.

As you can see in this photo of my studio, I have been working playing here also. As of today, all the out-of-town gifts are on their way. Still have some gifts to wrap, ornaments and cards to create as well as some holiday treats to make. So I will turn on some Christmas music and get lost in my creative world. Maybe I will have something to show and tell over the weekend.


Monday, June 2, 2014

Butcher Paper Collage

So, exactly what do you do at Ephemera Paducah? This is a question I am frequently asked by my non-crafting friends. Well, mostly I play. Sometimes I attend classes or participate in workshops. At a recent  Mixed Media Club we explored making butcher paper collage. The group graciously gave me permission to show these photos.  Using the technique found in Art Journal Freedom by Dina Wakely, we started by applying paint to a sheet of cardstock. Using Ranger Dylusions Ink Spray, we sprayed over stencils. To add some interest, we dip lids into paint and stamped the painted cardstock. For even more interest we thinned acrylic paint, loaded it onto a brush and let it drip down the paper.


When the collage paper was dry, we tore it into small pieces and adhered it to butcher paper with gel medium. We added tissue paper, book pages and other papers for interest. (I am trying to love the Dylusions Ink Spray, but so far it isn’t happening. I get frustrated when the ink smears into the gel medium, especially if I am using print like from a dictionary.)


After the butcher paper collage was dried, we used it to make covers for these little books.


Using the same technique, I made a bigger Wink journal!


.
.
 

Mixed Media Club meets the third Thursday of the month at EphemeraPaducah, corner of Madison and 9th Street. Located in the Lowertown Art District, the studio has a large space for working and Kristin generously shares her tools, stamps, paint, ephemera, etc. It is a fun way to try tools, products and techiques.  Currently we are working our way through Art Journal Freedom by Dina Wakely.