Showing posts with label Christmas. Show all posts

Saturday, December 31, 2016

Christmas Stocking Upgrade

I wonder if my crafting buddies are feeling like me this week; having had an awesome Christmas yet looking forward to once again being in back in my own little world  studio.

For me, here in The Underground, the best part of Christmas was having my daughter-in-law and granddaughters with me, and yes, we did have a bit of time in the studio. My oldest granddaughter, now 18 years of age, has out grown her baby stocking (Santa just can't get all her wishes into a small felt stocking).

Not wanting to part with it, we decided to make a larger one and attach the juvenile stocking to the front. So, out comes Miss Wilma and away we go, quilting the fabric.

Alison carefully marks the quilting lines.

Sister, Camille, helps with the quilting.


Now she has not just a stocking, but two stockings in one. Somehow I have a feeling that will not be enough!

The girls have returned to their home in Florida, leaving Handy Randy and I a bit lonely. No worries, in no time we will be consumed with projects to feel that "empty" place.

Wishing all of you a healthy and happy year full of crafting in 2017!


Sunday, December 20, 2015

To Chrystel with Love

In 2013 HR gave me this box of screws.

   with this note    


Two years later, here is my gift. (During this period he also built a screened porch while working full time and doing all the other things on my perpetual to-do list.)

Let’s begin with the area where I do a lot of planning and blog posting.

In the photo below, notice the slat wall, designed by HR himself.

All of the boxes and shelves can be moved and rearranged on a whim as demonstrated my by lovely assistant (and granddaughter,) Camille. Certainly that is a plus for a crafter with serious AADD!

HR did not make the colorful box collection but did put a cleat on the back so it too can be moved. It was the inspiration for my color choices. 
This is where I can get down and dirty with charcoal, paint, glue, you name it. 

A somewhat clean area where I can work with paper.
Another HR exclusive design provides three times the space for my stamps.


Love, love, love it!!!!

Let's move over to where the sewing takes place.
Directly across from the sewing machine is a cutting, laundry folding, and gift wrapping table,
that conveniently folds down when not in use (that rarely happens.)


So there you have it, a Christmas gift that was created with love by a very talented husband. 

Tuesday, December 23, 2014

Blessing Baskets in Paducah


Inspired to shop locally and avoid the mall and big box store crowds, I stopped in at the farmers market at Baptist Health Paducah on a Thursday morning to see what Crystal Troutt of Troutts Garden Soups & Such was selling. I have known Crystal for a long time and knew she would have the perfect food gifts. What I didn’t know was that she is selling Blessing Baskets.

In fact, I had not heard of the Blessing Baskets Project. As she explained the project, I was quite intrigued and asked if I could post some photos and share the link. She enthusiastically (that is Crystal!) said yes.
If you, like me, are not aware of the project, the baskets are made and bought directly from artisans (leaving out the middle person’s profit) throughout the world. It is a 501(c) organization whose mission is to help folks pull themselves out of poverty. I encourage you to go to their website, www.blessingbasket.org, and learn more about this amazing project.
The baskets are beautiful! However, I did not buy any as the ones she had with her had “sold” marked on them and she had already promised her next shipment.

I did buy hot drink mix gifts (and a few things for myself.)

When I got home, I realized I did not have the correct size gift bags. So, did I get in the car and drive to the mall area to buy bags. Nope, I had plenty of wrapping paper; using a tutorial on the Beautiful Mess blog, I whipped up four in probably less time than making a shopping trip.

I used Tombow Xtreme instead of the regular adhesive runner to prevent the seams from coming loose. Don’t ask me how I know about breaks in seams and candy falling out.

In the spring, Crystal and her husband will be opening the Troutt Old Time General Store and Market in Lowertown. They will be carrying the Blessing Baskets as well as other unique, wholesome products. (Think Mrs. Meyers cleaning products.) In the meantime, like her on Facebook and know when and where she is setting up her market.


Monday, December 22, 2014

Christmas Pillows

For the most part, I am sticking to my resolve to avoid the mall and big box stores for Christmas shopping. This week I spent time in The Underground making gifts.

I had quite a stash of burlap left from Art in the Garden in 2013. Using my Silhouette Portrait and freezer paper, some of it was turned into pillows. Taking advantage of the 12 Days of Christmas free designs from the SilhouetteStore, I had a grand time!

These designs were not free designs, but I did get them for half-price (50 cents) earlier in the month.


One of my granddaughters  redecorated her room this year, using purple and gray with a French flair. I found this burlap in my stash and thought it might work for her.

On the reverse side of the burlap, I stenciled a fleur-de-lis for the front.

My daughter-in-law requested a fleur-de-lis pillow. I did this one on canvas 

If you have not yet tried the freezer paper stencil tutorial on the Silhouette School Blog, it is a really simple process. Hop on over to their site and take a look.
Let me share a few tips from my experiences.

  • Bold colors tend to show up better on burlap. When some of the colors I chose were too light, I repainted with a darker color after I removed the stencil.
  • Thread the color of the burlap works great to correct paint bleeds in a small area.
  •  If using a white pillow form, it looks best to use a natural color (like muslin) for a liner.
  • For me, I find more paint bleeding when stenciling on canvas making the edges a bit fuzzy. I found the heavy acrylic works better than craft paint.


On Wednesday I will share some of my 2014 gift ornaments. 

This year we are giving our oldest granddaughter our gift of time. She has wanted a garden for some time so in the early spring my husband will build her a 4-foot square bed; I will help her with the planting. Her favorite fruit is strawberries so I thought it would be neat to present her a gift card for the garden in a strawberry basket with the suggestion she plant strawberries. I did make a trip to the candy store in the mall to buy strawberry candy for the basket, but I thought that would be okay as it needed special touch. 

Friday, December 19, 2014

Holiday Sugared Cranberries


A favorite treat from my kitchen during the holidays.
I shared these wonderful little gems with my Mixed Media Club friends at Ephemera Paducah last evening. As usual, there were request for the recipe, so here it is:

Ingredients:
2 cups water
2 cups granulated sugar        
2 cups fresh cranberries
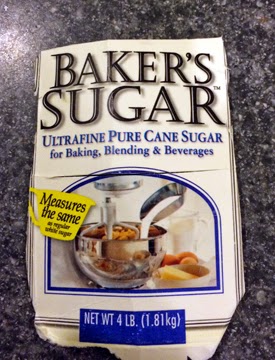
3/4 cups superfine sugar                                                                                                                                                     
First step:
Combine granulated sugar and water in a saucepan over low heat, stirring mixture until sugar is dissolved. Bring to a simmer, remove from heat (do not boil as the cranberries may pop when added.)

Stir in cranberries; pour mixture into a bowl. Cover and refrigerate 8 hours or overnight.

Next step:

Drain cranberries in a colander over a bowl, reserving steeping liquid if desired. (I save the liquid and use it for a second batch.)

Place superfine sugar in shallow dish (you may have to search for the superfine sugar, I ordered the Baker brand from King Arthur, found the Domino brand tucked away in the sugar section at Krogers.)


Add the drained cranberries, a few at a time, to the bowl and coat with sugar.

Spread sugared cranberries in a single layer on a sheet of wax paper, let stand at room temperature 1 hour or until dry.


My recipe says to store in an airtight container in a cool place for up to one week; can’t comment on the storage as we have never had them last that long.


If you want to print this recipe, note the print view option at the end of this post.

After dining on an array of delicious finger foods and a quick game of dirty Santa, we got busy and worked on our board book journals.


I am always so amazed at the talent of this group! Some are accomplished mixed media artists, some are fine art artists, some are textile artists; they all are so generous in sharing their knowledge and skills with me, a wanna be artist!

The start of my Live Richly journal, 


Thursday, December 18, 2014

Confession time, I have been playing and neglecting the blog. Oh, but I am having fun!


Last week I was invited to join the team from iList Paducah and some other crafty gals for lunch and play at Ephemera Paducah. Kristin provided paper maché letters to spell J-O-Y for us to paint, paper, glue and glitter. Head over to iList and Kelsie will explain the technique and show everyone’s unique style.


On Friday afternoon, local artist Carol Harlan led a workshop on painting tissue and deli paper at Ephemera Paducah


We had great fun coloring diluted gel medium and painting over the sheets.
After they were dry we embellished with more paint and bling.  These will be great to use in art journals.


Guess what we are doing at Mixed Media Club this evening at Ephemera Paducah? Working on board books which work well for art journals! I missed last month’s meeting so I will have a bit of catching up to do.  Kristin says we need a theme; I am going with “Live Richly.” I will use quotes and images to describe what makes life rich for me. Maybe I will share this at a later date.

As you can see in this photo of my studio, I have been working playing here also. As of today, all the out-of-town gifts are on their way. Still have some gifts to wrap, ornaments and cards to create as well as some holiday treats to make. So I will turn on some Christmas music and get lost in my creative world. Maybe I will have something to show and tell over the weekend.


Tuesday, December 2, 2014

It is time for Christmas in The Underground!

I am back in The Underground after spending Thanksgiving with friends and family in Texas and attending the Texas A&M / LSU football game (Aggies lostL) Oh, and we went from Kentucky to Texas via Florida. Now why would one do that? Well our granddaughter had the role of Clara in the North West Florida Ballet production of The Nutcracker!  (she was fabulous!) I am now totally ready for the Christmas season, so much more so since I no longer have to plan around a nurse’s schedule!

A couple of weeks ago, my friend, Stephanie, shared on her blog WoolyThyme, her feelings about Christmas shopping on Thanksgiving Day. It gave me pause as I thought about Christmas and what it  means to me. I don’t think of myself as an extravagant consumer; in fact I am pretty conservative. I love the idea of finding creative ways to avoid scanning the credit card and maneuvering through stores. As I thought about this, several things came to mind; I will share these ideas as they materialize.

I certainly prefer spending time in my studio to spending time at the mall. I can’t think of a better stress inhibitor! Thanks to the generosity of my good friend, Tracy Badger , I have an abundance of beautiful Christmas papers perfect for cards and gift tags. (Tracy gave up crafting to focus on her music and I now have her stash!)  Last evening I used my Silhouette Portrait to make tags. (Okay, this isn't a biggie, but one has to start somewhere.)

Using a template from the Silhouette Store I designed the tags to be cut from two sided card stock. After I had my design, I moved the tag template from the work space and used the sketch pens to write To and From. Keep in mind, most text will be an outline but sketch text can be downloaded from the Silhouette Store (Everything in the design store is ½ off through December 8.) After the pen did it’s sketch, I left the paper on the mat in the Silhouette, placed the tag template back over the To and From, after I was satisfied with the placement, I moved the text to the side, replaced the pen with a blade, changed the setting to cardstock and clicked send to Silhouette.

This was pretty easy so I thought I would do another design. Looking through the Christmas paper stash I found this:

A pad with pretty tags just waiting to be cut out! You won't find me standing in line to purchase gift tags!